

I spent about four years thinking my laptop microphone was fine. It wasn't. I found out the hard way on a client call when someone finally said, out loud, on the recording, that I sounded like I was calling from inside a running dishwasher. That was the day I bought a Logitech H390 wired headset for twenty four dollars and change, and it is the single cheapest fix I have ever made to how I come across on a call.
This guide is not about buying gear and hoping for the best. It's the actual five step process I use to get clean, professional audio every time, whether it's a client call, a job interview, or a Tuesday standup nobody wants to be on. None of it requires special software or a sound booth. It requires a decent headset, a few minutes of setup, and knowing what actually causes bad call audio in the first place.
None of this is complicated once you see it laid out, but almost nobody lays it out. Most people either buy an expensive headset and assume that fixes everything, or they never touch their audio setup at all and just live with sounding a little worse than they should on every call they take. Five small steps closes that gap completely, and it takes about ten minutes total to do once.
Skip the trial and error, get the headset that actually fixes this
The Logitech H390 is the wired USB headset I've used for years of daily calls. Noise cancelling mic, in-line controls, plug and play on basically anything with a USB port. Check today's price and see if it's in stock.
Amazon Check Today's Price on Amazon →Step 1: Stop using your laptop microphone entirely
The built-in mic on almost every laptop sits below your hands, pointed at your keyboard and the open room behind you. That means it picks up your typing, your fan, your kid's cartoon two rooms away, and your voice, all mixed together at roughly the same volume. There is no software fix that changes where the microphone physically sits.
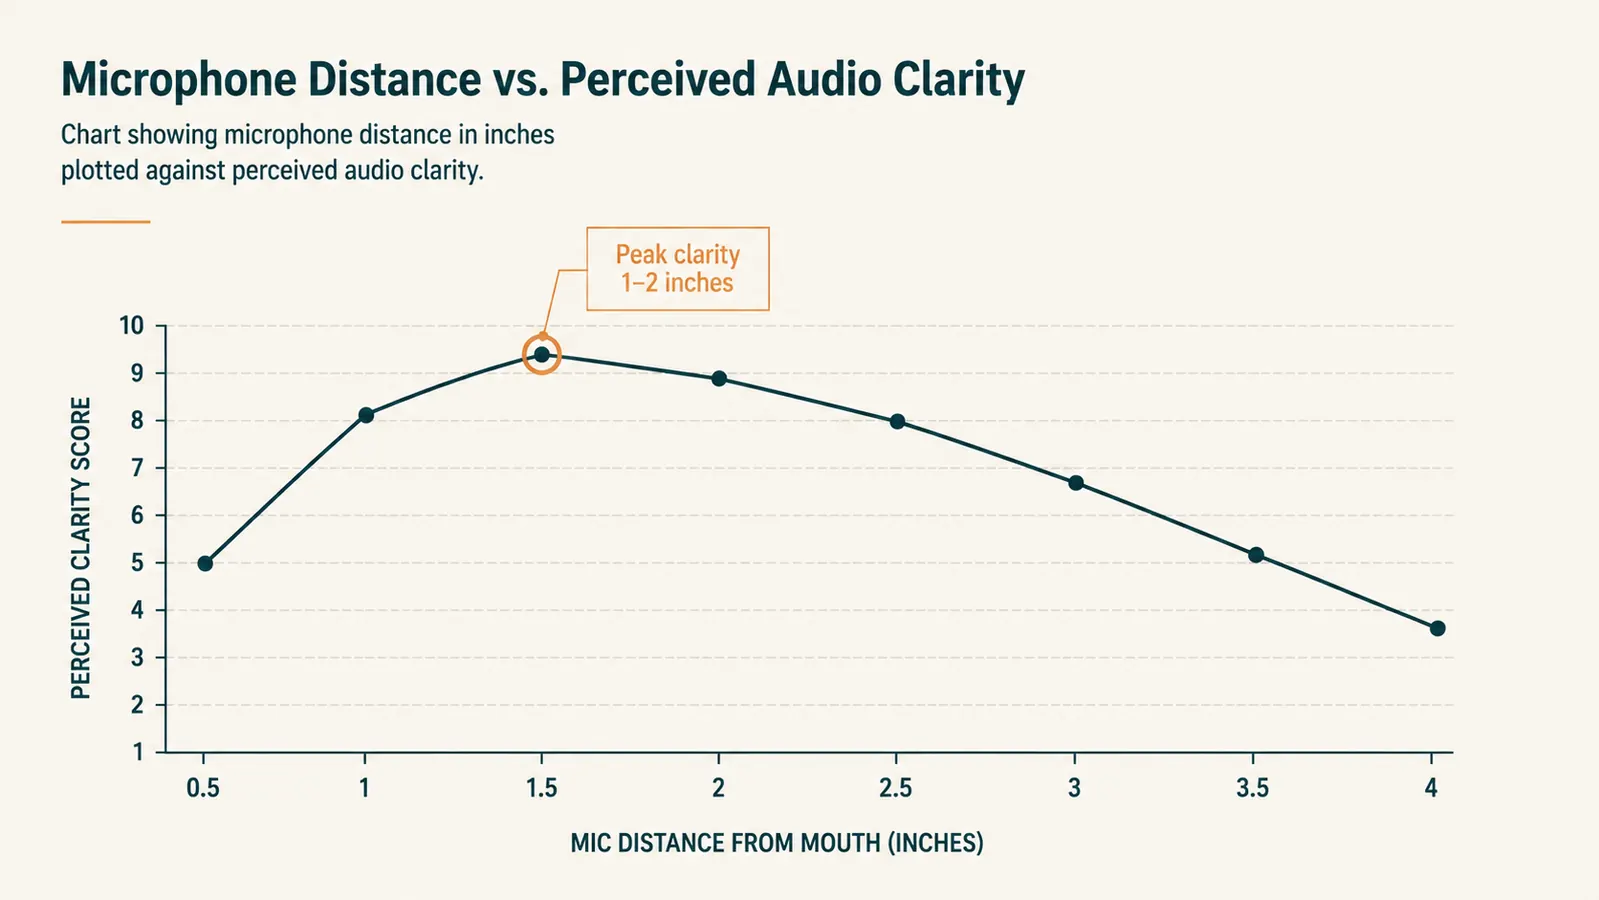
A wired headset solves this by putting the mic an inch or two from your mouth instead of eighteen inches away and pointed the wrong direction. That distance difference is the whole trick. It's not a fancier mic, it's a closer one. Once I made the switch, I stopped getting the "you're cutting out" and "can you repeat that" comments that used to happen on every single call.
If you're using AirPods or a cheap Bluetooth earbud for calls, the mic problem is usually worse, not better, because those mics are even smaller and have to work harder to isolate your voice from background noise. A wired headset with a dedicated boom mic beats both a laptop mic and most earbuds for spoken clarity, full stop.
There's also a reliability angle people don't think about until it bites them. Bluetooth can drop out mid sentence, pair to the wrong device, or lag behind your video by a fraction of a second that makes you look like you're being dubbed. A wired USB connection doesn't have any of those failure points. Plug it in, it works, and it keeps working for the full length of the call without you thinking about it again.
Step 2: Position the microphone boom correctly
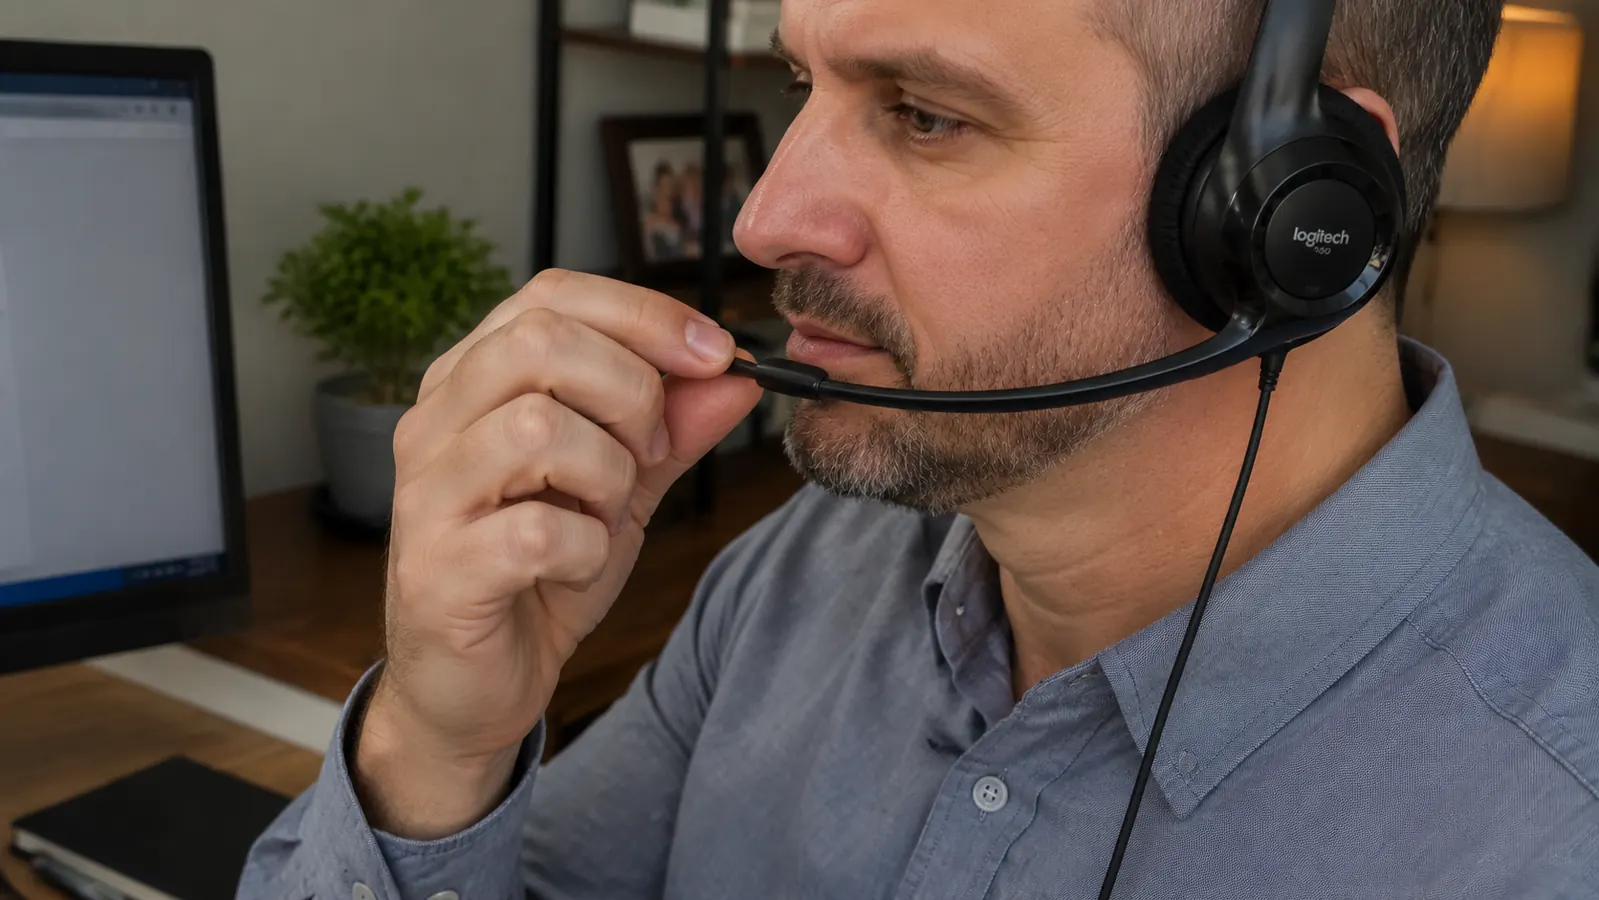
This is the step almost everyone skips, and it's the one that makes the biggest difference. The H390's mic boom is flexible for a reason. You want the tip sitting about an inch to an inch and a half from the corner of your mouth, not directly in front of your lips. Dead center in front of your mouth catches every breath and every p-sound as a pop. Off to the side by even half an inch clears that up completely.
Too far away and you lose the whole benefit of a close mic, your voice thins out and room noise creeps back in. Too close and you get that muffled, breathy sound that makes people ask you to back off the mic. I tell people to start at two inches, say a full sentence out loud, and adjust half an inch at a time until it sounds natural, not boomy, not distant.
Do this once with the headset on and talk to yourself for ten seconds while watching your input meter in Zoom or Teams settings. You're looking for the level to bounce comfortably in the green without spiking into red on normal speaking volume. That ten second check has saved me from finding out my mic was in the wrong spot during an actual client call more times than I'd like to admit.
It's worth marking the spot once you find it. I've noticed the boom on mine tends to drift slightly if I take the headset off and put it back on a few times during the day, especially if I'm pulling it off between back to back calls. A quick glance and a small adjustment before each call takes five seconds and prevents the slow drift that eventually puts the mic in a worse spot without you noticing.
Step 3: Set your input device correctly in every app you use
Plugging in a USB headset doesn't always mean your call software automatically switches to it. Zoom, Teams, Google Meet, and your operating system's sound settings each have their own audio input dropdown, and they don't always agree with each other. I've walked into calls where my computer was using the headset but Zoom was still set to the internal laptop mic from the last meeting.
Go into your system sound settings first and confirm the headset is selected as the default input and output. Then open whatever call app you're about to use and check its own audio settings separately, before the call starts, not during it. It takes fifteen seconds and it's the difference between sounding clear from the first word or wasting the first two minutes of a meeting on "wait, can everyone hear me now?"
One more thing worth checking, some apps have their own automatic noise suppression or gain control that can actually work against a good headset mic by over-processing your voice into something robotic. If your audio sounds a little too processed or compressed, try turning off the app's built-in noise suppression since the H390's noise cancelling is already handling most of that at the hardware level.
If you jump between a laptop and a desktop during the week, it's worth checking both machines separately rather than assuming the settings carried over. I keep a sticky note on my monitor that just says "check audio input" because I got burned enough times skipping this exact step on my second machine.

Step 4: Control the room, not just the headset
A good headset cuts a lot of background noise, but it isn't magic. If you're sitting three feet from a box fan or a barking dog, some of that is still going to bleed through, especially if you're speaking at a normal volume in a loud room. I keep my desk fan on a low setting during calls now instead of full blast, and I close the office door when my dog Diesel starts up at the mail carrier. A plug-in headset like the Logitech H390 fixes most of it before you touch a single software setting.
Soft surfaces help more than people expect. A room with a rug, curtains, and a couch absorbs echo. A bare room with hard floors and a window behind you bounces your voice around and makes you sound distant even with a great mic. You don't need acoustic foam, just don't do your important calls in an empty garage or a tiled bathroom, which sounds obvious until you realize how many people work calls from exactly those spots because it's quiet.
Mute discipline matters too. Muting when you're not talking, especially in a house with other people or pets, keeps the call clean for everyone else even before they hear a word from you. In-line mute controls, which the H390 has right on the cable, make this a one-button habit instead of a menu you have to dig through.
Time of day plays a bigger role than most people realize as well. If your street gets loud with traffic or trash pickup at a certain hour, or your household gets noisier once school lets out, scheduling important calls around that pattern is a free fix that costs nothing and works every time.
Nobody has ever complimented my headset. They just stopped asking me to repeat myself. That's the whole goal.
Step 5: Do a real test call before it matters
Every video platform has a test call feature. Zoom has a test meeting you can join solo, Teams has a "Make a test call" option in settings, and you can always just record a voice memo on your phone from across the room to hear how you actually sound. I do this any time I've changed rooms, changed headsets, or haven't been on a call in a while.
Listen back specifically for three things: is your voice clear without sounding harsh, is there background hum or hiss under your voice, and does volume stay consistent when you turn your head slightly. That last one matters more than people think, since a lot of us move around while we talk, and a headset mic that's positioned well should keep picking you up even when you're not facing straight ahead.
If something sounds off, go back to step 2 and adjust the boom position before you assume you need new gear. Nine times out of ten a bad test call comes down to mic placement or the wrong input device selected, not a hardware problem.
I run this same test any time I'm about to do something that actually matters, an interview, a pitch, a call with a new client. It takes ninety seconds and it means the first impression is a clear one instead of me finding out mid call that something's wrong and trying to fix it while someone's waiting on the other end.
What Else Helps
A good headset gets you most of the way there, but a few small habits stack on top of it. Speak at a normal, even volume instead of leaning in and half-whispering into the mic, since that actually makes noise cancelling work harder and sound worse. Keep the headset cable away from anything it can rub against, since cable noise transmits straight into some mics. And if you're on calls for long stretches, a lightweight headset like the H390 matters just as much for comfort as for audio quality, since a headset that pinches after forty minutes gets pushed slightly out of position without you noticing, which quietly degrades your mic placement mid-call.
It's also worth thinking about your video, since audio and video get judged together even though people mostly notice audio consciously. Good light on your face and a camera at eye level make the whole call feel more put together, and a clean audio setup pairs naturally with that. None of this needs to be fancy, it just needs to be intentional instead of an afterthought you deal with once someone complains.
None of this requires a home studio or expensive gear. It requires one decent piece of equipment set up correctly, checked once in a while, and a room that isn't actively working against you.
Get the headset, then never think about call audio again
This is the exact model I've used for years of daily client calls, interviews, and meetings. Wired, plug and play, noise cancelling mic, in-line mute. Check today's price on Amazon before you set up your next call.
Amazon Check Today's Price on Amazon →